GitHub Pages is a very convinient way of making personal or project webpages. There are a lot of templates available as well that allow for quick development of simple webpages. This website is built on top of the Beautiful Jekyll theme.
I wanted to make a simple personal blog and wanted a custom domain name associated with it. Custom domain names are easy to remember and share. So I bought the ahsan.io domain name and used it for this webpage. I used the AWS Route53 service for registering my domain name.
Creating a GitHub Pages website and associating it with a custom domain name is very easy. In this blog I describe the steps that I went through in order to setup this website.
- Create a GitHub Pages public repository. Be sure to name it
<username>.github.iowhere<username>is your username on GitHub. - Clone the repository and develop your custom webpage. Or you could also use a theme.
- Push the changes to GitHub. In a few moments, your webpage should be accessible on
<username>.github.io - Now we want a custom domain that points to our website. You can use any registrar to register your custom domain name. I used AWS’s Route53 service to register my domain name
ahsan.io - Create an CNAME record against your newly created hosted zone for the domain name you bought. Set its value to
<username>.github.io. - In your GitHub repo, add the custom domain by following steps mentioned on GitHub. Now your webpage should be accessible on your custom domain name.
Most people will be happy at this point with their shiny new blog being served on GitHub Pages with a custom URL. But if you’re like me, you would also want the connection to the webpage server to be secure (over HTTPS). In order to achieve this, we have to go through some additional steps.
-
We need to associate our own certificate with our server in order to make the connection between client and server secure. For that reason, we’ll use AWS’s CloudFront as a CDN for our GitHub Pages website. This will allow us to attach our own certificates to the CloudFront distribution using AWS’s Certificate Manager.
-
Create a new CloudFront Web distribution with
<username>.github.ioas the origin. I like to redirect viewers from HTTP to HTTPS so that all of my clients connet over a secure connection. Set the time-to-live to your preference. -
In the SSL Certificate section, select the
Request or Import a Certificate with ACM. -
Follow the ACM wizard to create and associate certificates with your CloudFront distribution. The certificate creation and association might take a few minutes.
And thats it! now you have a GitHub Pages webpage that is accessible through a custom domain name over HTTPS! How cool is that?
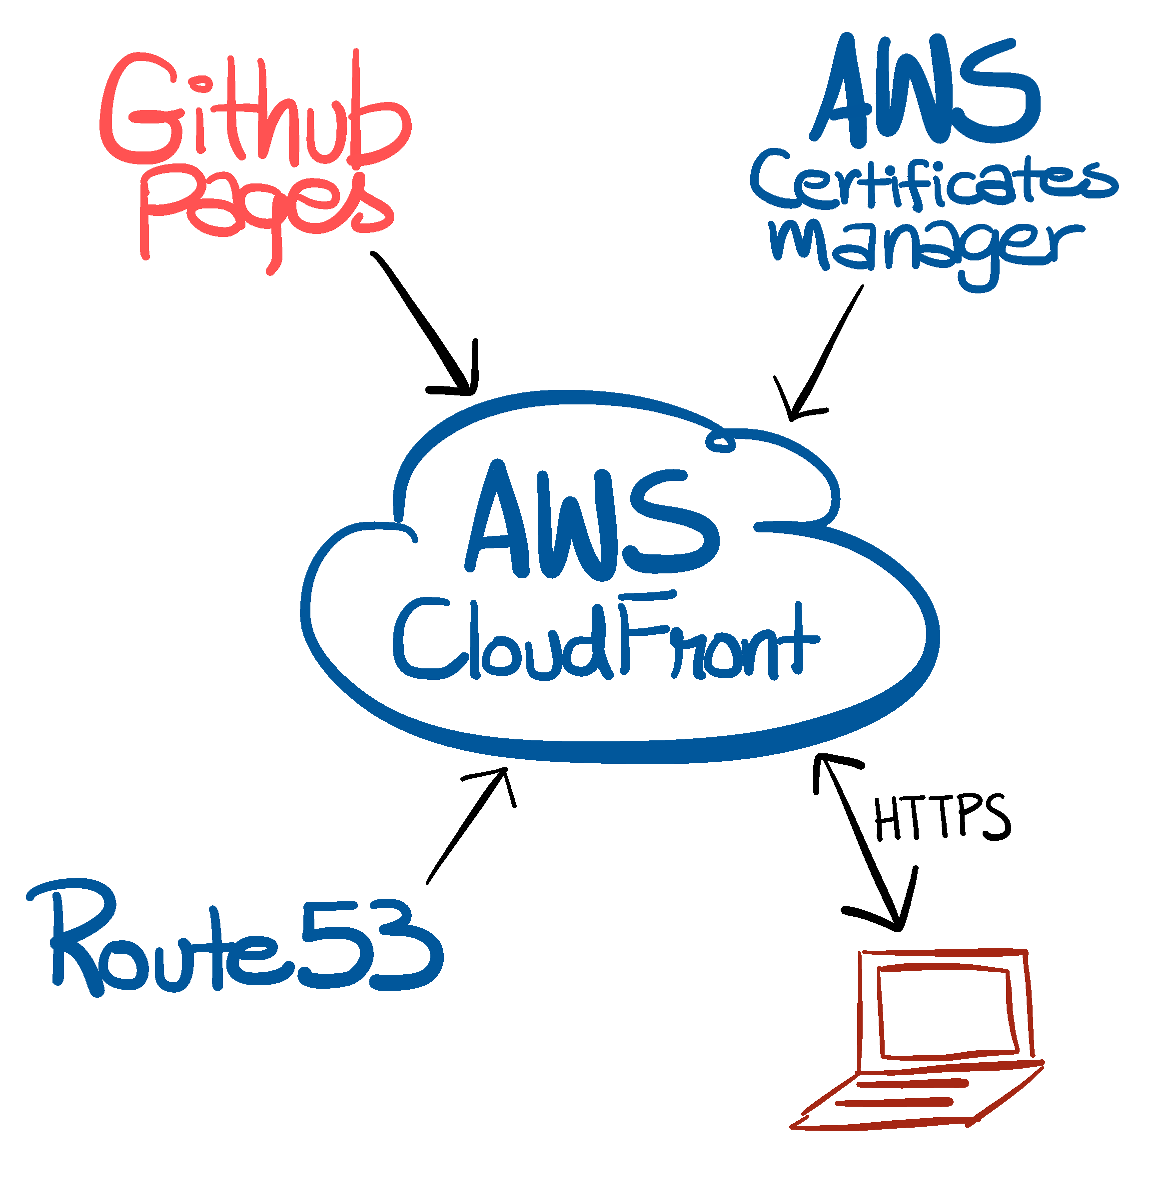
At the end of the day, the website server architecture will looks like this: